How To Set Up A Shopify Store Step By Step
We know stepping into the world of eCommerce, online selling and Shopify can be a perplexing mind-boggling minefield…
Every step you take a new explosion of information catapults you in a different direction.
Enough is enough, Let’s make this easy for you.
Follow the steps outlined in this article and have your shopify store set up in 7 simple steps!
Let’s Get Started
If you’re thinking about starting an online business, congratulations!
We are going to help make this a reality. By the end of this article, you will have a fully functioning Shopify store with all the bells and whistles.
Shopify has skyrocketed in popularity and is one of easiest eCommerce platforms to use and set up your store.
It is easy to create a Shopify online store similar to a physical store
Regardless of niche, with Shopify, you can sell virtually ANYTHING! Think clothing, flowers, accessories, candles, gift boxes, food, coffee, books, electronics. Build a brand around your hobbies, interests or trending industries for super profits.
When it comes down to the nuts and bolts, setting up a Shopify store is relatively simple and can be done in just a few steps.
This article will discuss the step-by-step processes to set up a Shopify store.
Please, continue reading if you need help setting up your Shopify store.
Some Basics Before You Set Up A Shopify Store
In order to set up your Shopify store you need to understand some basics.
Every store or brand you create should follow certain standards.
- You want your store to look professional.
- You want well written, catchy and detailed product listings that attract potential buyers.
- You want your own branded domain.
We believe setting up a brand domain is crucial. It helps people to find your e-commerce store on the internet.
These standards will be beneficial to your business. Keep them in mind as we run through the next 7 steps in detail.
Step 1: Sign Up For a Shopify Account
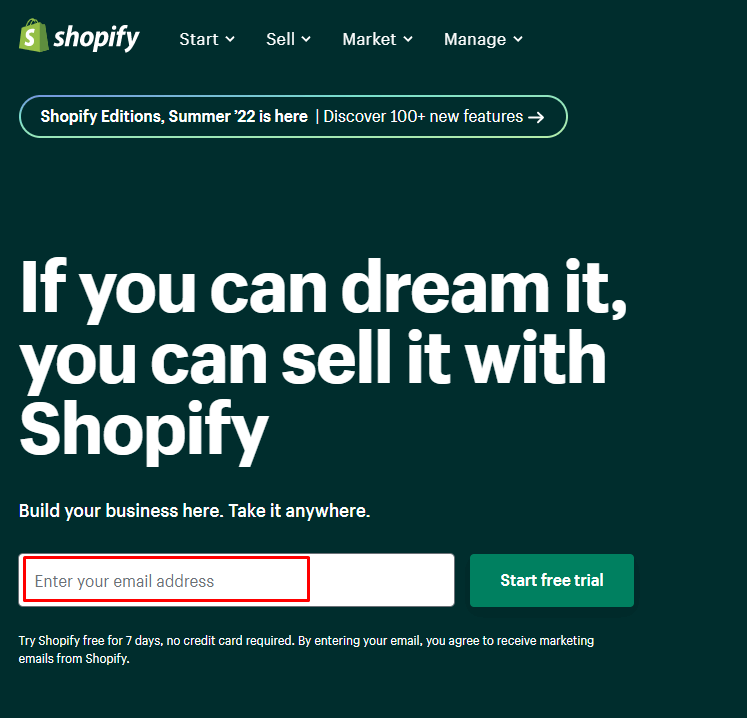
The very first step is navigating to the Shopify home page.
You have a lot to look over, so make sure you’ve had a chance to read everything before you sign up for an account.
To sign up for a Shopify account, you have to enter your email into the appropriate field and click on the “Start free trial” button.
Next, you can either fill in the following basic information by selecting or “skip” them.
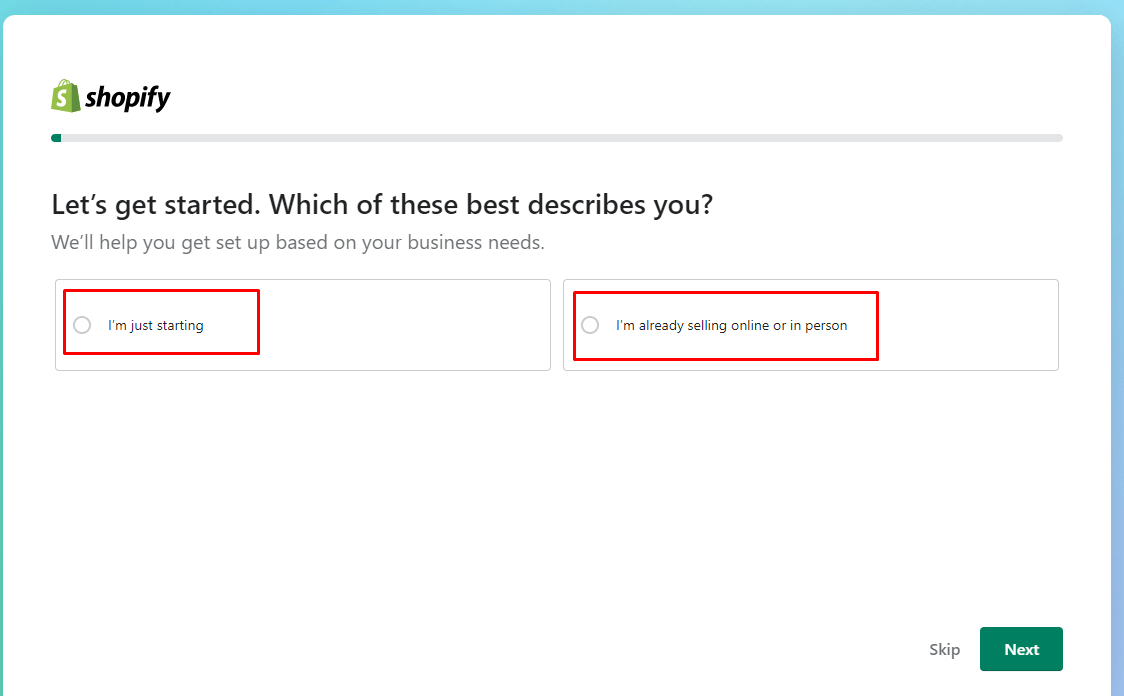
- Which of these best describes you?
- Where would you like to sell?
- Which social channels do you want to sell on?
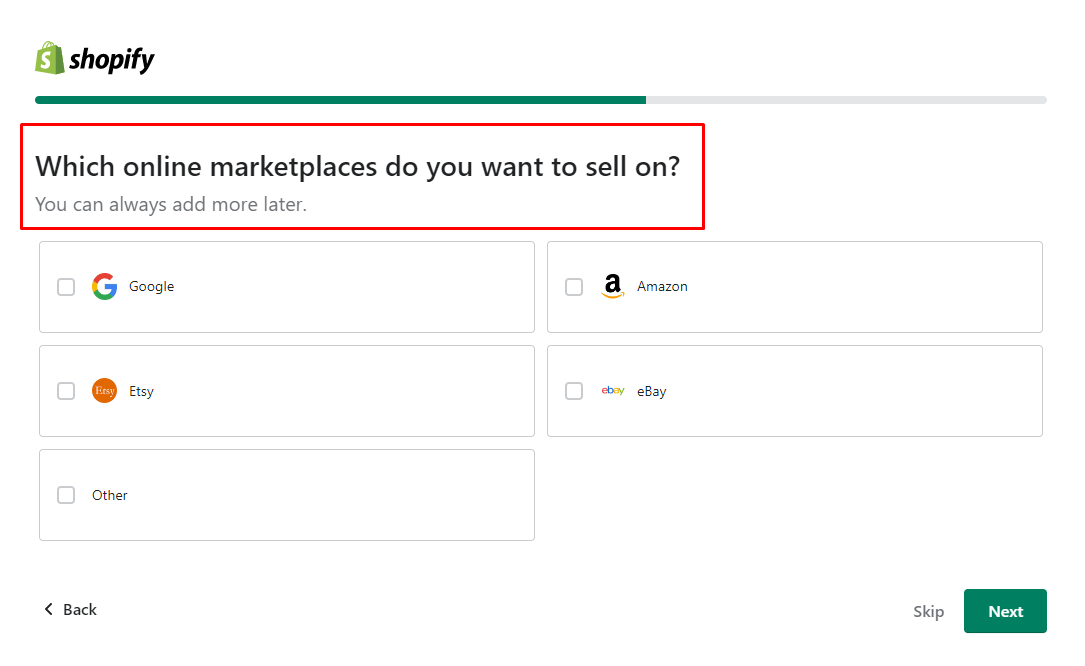
- Which online marketplaces do you want to sell on?
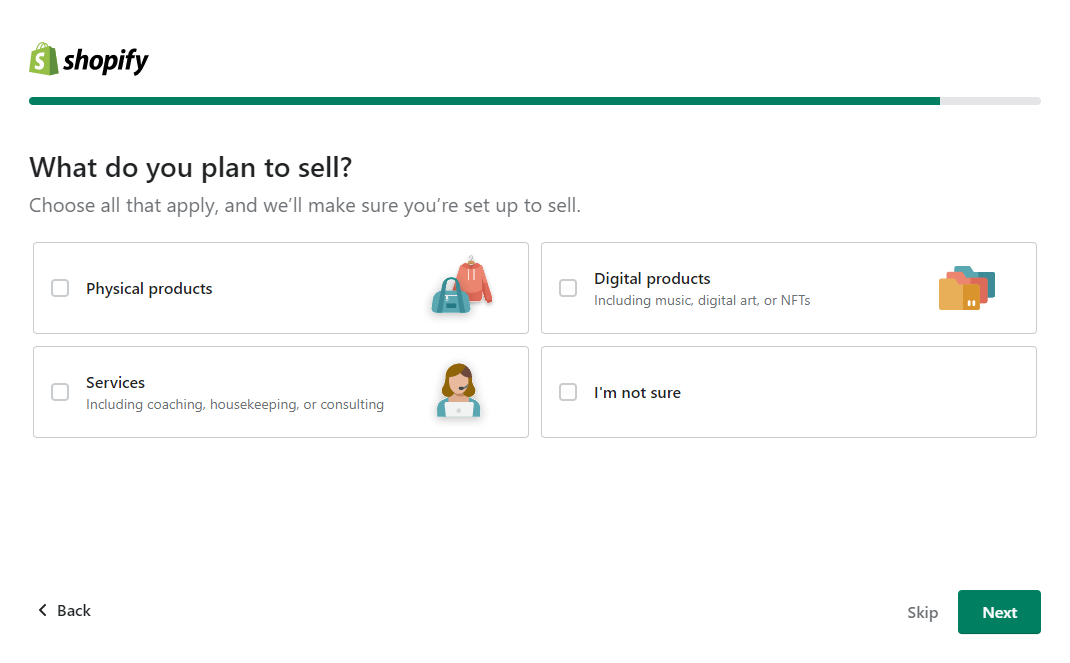
- What do you plan to sell?
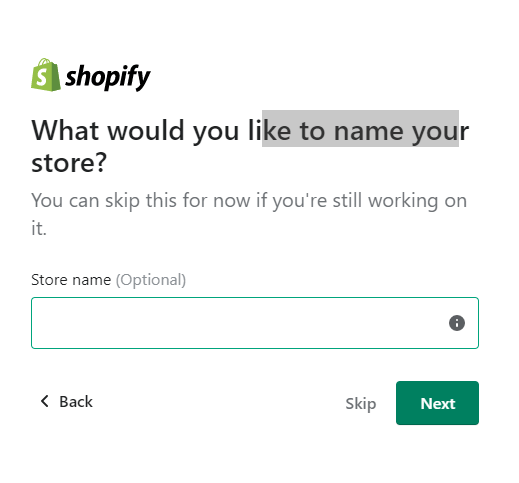
- What would you like to name your store?
Which of these best describes you?
Choose from i’m just starting
or
I’m already selling online or in person
Once selected hit next.
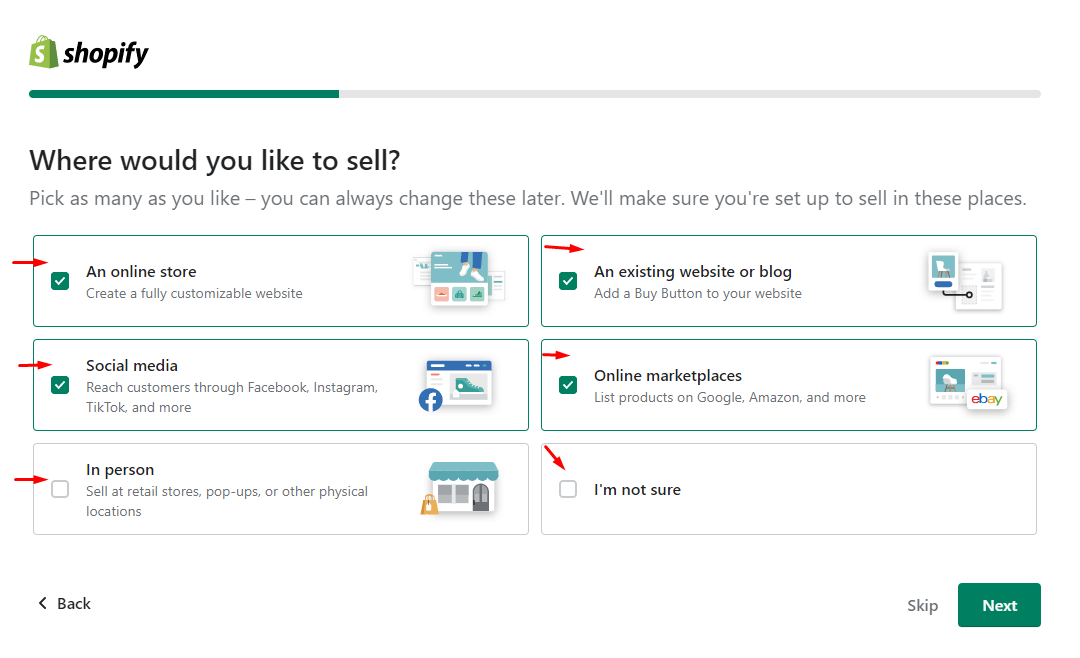
Next question is where would you like to sell
Choose from
- An online store – Create a fully customization website
- Social media – Reach customers through Facebook, Instagram TikTok and more
- In person – Sell at retail stores, popups or other physical locations
- An existing website or blog – Add a buy button to your website
- Online marketplaces – List products on Google, Amazon and more
or
I’m not sure.
Once selected hit next.
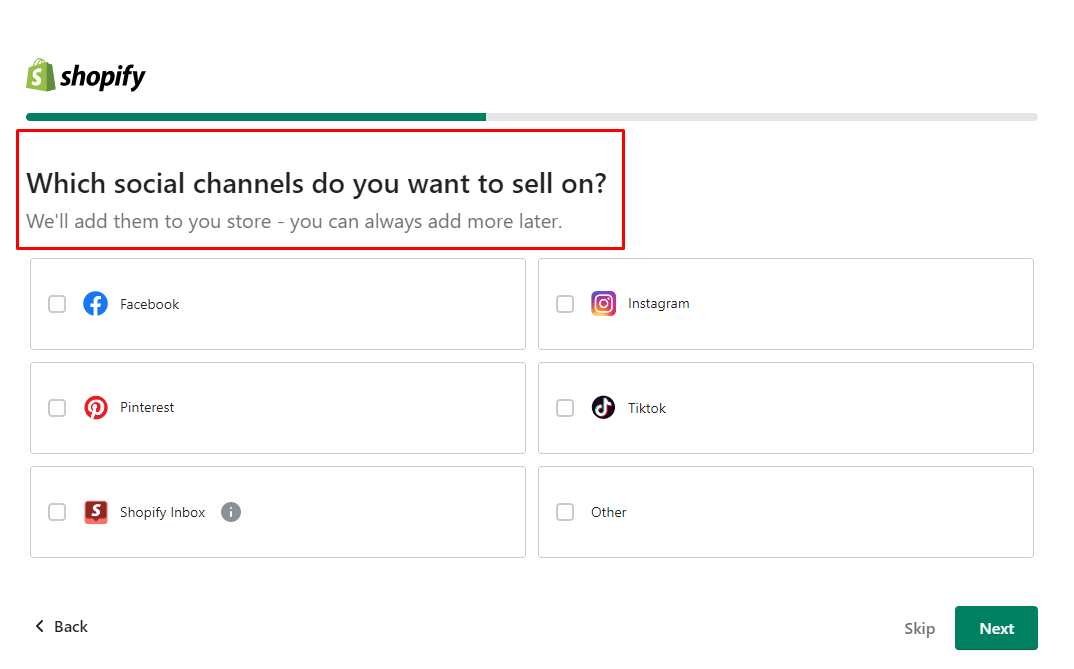
Next option is which social channels do you want to sell on?
Choose from
- Shopify Index
- TikTok
- Other
Once selected hit next.
Next question is which marketplaces do you want to sell on?
Choose from
- Etsy
- Amazon
- Ebay
- Other
Once selected hit next.
Next you want to tell Shopify what you plan to sell.
Choose from
- Physical products
- Services
- Digital products
Or I’m not sure
It doesn’t matter if you are not 100% sure of these answers, you are not locked into anyhing.
You can change your selections at any time.
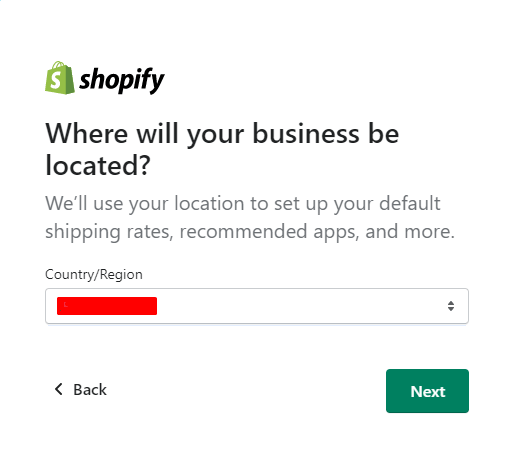
After that, you must answer two mandatory fields.
-
Where will your business be located?
They show your current location by default.
-
Create a Shopify account.
In this section, you have to set a password under the email. Ensure that the password is strong enough.
The next part is logging in to Shopify. You can log in by “continue with email”, “continue with apple,” and continue with Facebook or Google.
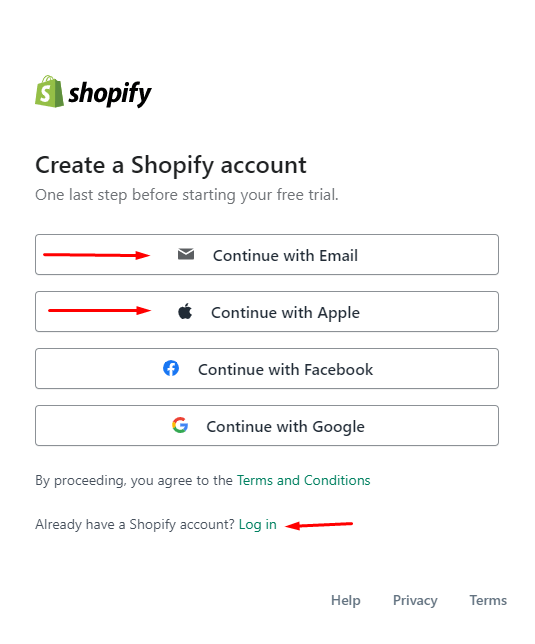
After logging in, go ahead and take some time to study the layout. Here you will find the email verification option.
Once verified head onto the next step.
Step 2: Go to Store details Option
Name your store and set your legal business name
Store Details Summary
- From your Shopify home menu, go to Settings.
- Click Store details.
- In the Basic information section, click Edit.
- Enter your online store name and legal business name.
- Click Save.
Your business name is more than just a name—it’s your identity.
It’s how customers will find you, and it’s how they’ll remember you. Before you can start using your business name, you need to choose it. And then, you need to set it up as your legal business name.
The process of naming your shop is different for everyone. For some, the perfect name comes easily. For others it takes time and effort to find the right one. Either way, here are a few things to remember when choosing a name for your Shopify store.
First, think about what kind of impression you want your store to make. Your business name can reflect the products or services you offer, be quirky or totally random. The key is to match the overall tone of your brand.
Second, don’t use a name that is already being used or too similar to other brand names or trademarks in the industry.
Finally, search your desired business name in the Shopify business name generator to ensure it’s not already being used. It’s free, and it’s easy to use.
This will help you to come up with a great eCommerce store name. You just need to put one or multiple keywords related to your eCommerce store name, and it will recommend lots of unique and catchy ones. Then you can scroll down all the suggestions and select the one you like.
After selecting your store and legal business names, you must Set or change the following things.
- Set or change your business address
- Set or change your business contact information
- Set or change your store time zone and weight unit
- Select a store currency
- Shopify shipping zone
Step 3: Choose a Shopify theme for your store
Having an excellent Shopify theme is important for any store. It can help with branding and ensuring your products are showcased in the best light.
Shopify makes it super easy to choose a default theme for your eCommerce store, so you don’t need to change this if you’re satisfied with how it looks.
It’s always best to have a unique site built from scratch for your eCommerce business, as it will help you to enhance your business brand. However, you don’t need to create a customized site when launching the store.
If you want to test and change your Shopify default theme, we recommend using the free shopify themes. You can change, rearrange, hide, or remove any content in a theme. You can try different layouts until you find the one that looks good on your Shopify site.
The other option is looking into premium Shopify themes, these will come with a cost, though might perform slightly better. It’s our recommendation to focus on generating enough sales through your Shopify business before buying a premium theme.
When choosing themes for your new Shopify store, there are a few things we like to consider.
Theme considerations:
- The overall look and feel of the theme
- How easy it is to navigate
- If it’s mobile friendly
- If it integrates well with other apps
- The support that comes with the theme
Test and trial as many shopify themes as you like, a top tip is asking for feedback from your existing customers. Real customer feedback is like gold. You wan’t to make it as streamlined as possible.
Millions of sales are won and lost in the checkout process!
Step 4: Fine Tune Your Settings
Set Up Payments
The good news is, setting up payments for your shopify store is pretty straightforward. You can choose to use Shopify Payments, a third-party provider such as PayPal, Meta Pay, google pay, Amazon Pay, and Apple Pay.
We like using Shopify Payments. Regardless of your location, it’s a secure, flexible eCommerce payment system.
By using Shopify Payments, you can enable the Shop Pay option that lets customers save their Shopify shipping and payment information to check out faster. You will also find the accelerated checkout buttons in other third-party providers like Paypal, Amazon Pay, Apple Pay, and Google Pay.
It’s interesting to know cryptocurrency is an increasingly popular means of accepting payments online and can also be investigated if interested.
Making a sale is only half the battle!
As a seller, it’s good to take a look at all the different methods your customers can use to make purchases from your store.
If you allow customers to pay the way they like to pay you have a better shot at closing the sale and a better chance your customers will come back.
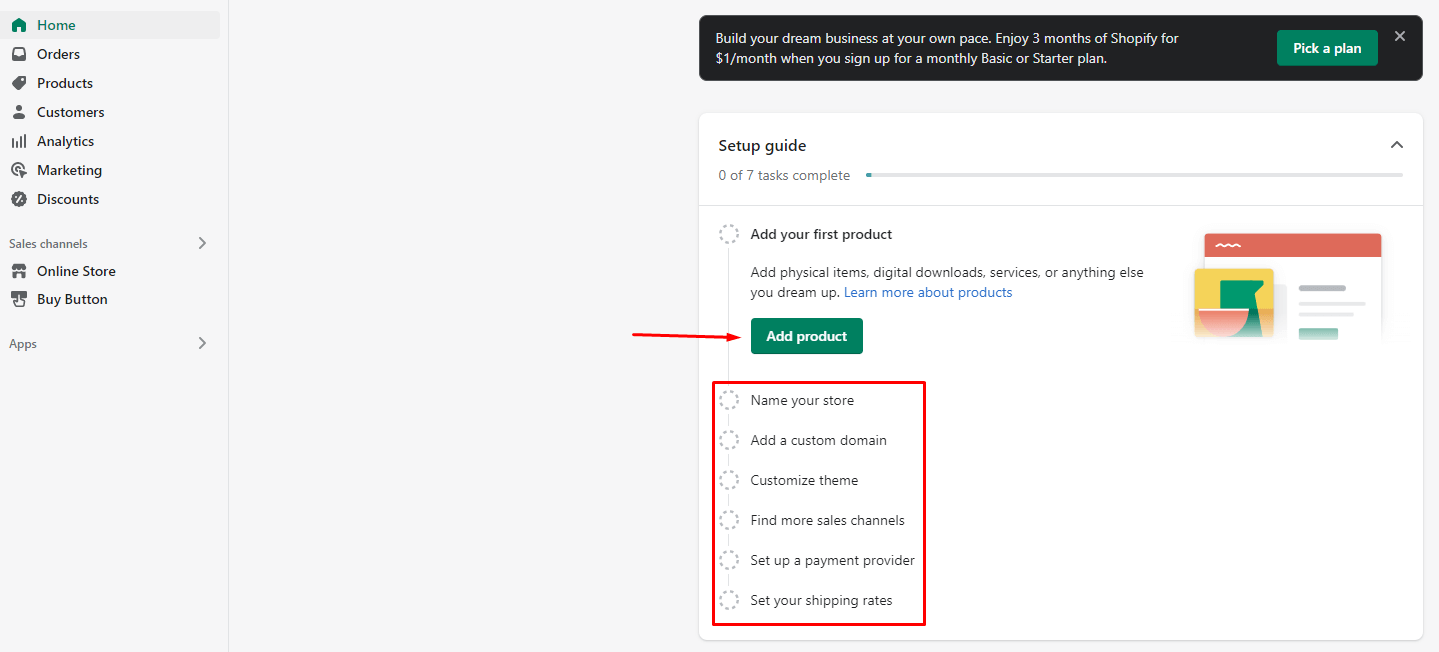
Set Up Checkout
Most shoppers will appreciate a fast checkout process that is easy to navigate. Shopify offers you several ways to create a quick and streamlined checkout experience.
You can easily manage your checkout settings using your Shopify admin. From your Shopify admin, you can also add an option to send emails to your customers with reminders about upcoming orders.
Shopify also provides many ways to automatically collect email addresses from your customers. You can do this automatically when someone buys from you.
Optional checkout
Keeping customer accounts optional is a good idea so customers can also check out as guests. You might also want to include the email option as optional.
Customer contact
If you want to focus on building an email or contact list, you may want to consider setting up the email or contact option as mandatory. This gives you the ability to follow up and connect with them by texting messages or email campaigning.
Email marketing
You can offer your customers a subscription at the time of checkout. Then you can keep your customers informed about the new products or discounts you have, and you can create an opt-in list.
Generate Required Policies
When you set up a new Shopify account, there are a few required policies you need to generate before you start selling online. These include a Privacy Policy, Terms of Service, and a Refund Policy.
Steps: Shopify Settings > Policies > scroll down to Refund policy > Privacy policy > Terms of service > Shipping policy > Contact information to generate each policy sample.
Add Free Shipping Rates
Adding a free shipping rate to Shopify is a great way to encourage customers to purchase from your store. By offering free shipping, you are essentially giving customers a discount on their purchases, which can entice them to buy more items from your store.
In order to offer a free shipping rate in Shopify, you will need to go to the Settings to Shipping and delivery page in your Shopify admin. Then click on the “Create Shipping Rate” button.
From there, you will need to select the “Free Shipping” option and enter the details of your free shipping offer. Once you have saved your changes, your customers can see the free shipping rate at checkout.
Set up Taxes
You need to set up your taxes if you have a shop on Shopify. Fortunately, Shopify makes it easy to set up your taxes, and they even have a default tax setting that auto-calculates your taxes. However, if you want to change how your taxes are calculated, you can do so in the settings. Here’s how to set up your taxes in Shopify.
In Shopify, go to Settings > Taxes and duties.
If a product has a high default rate, you can edit the default rates to adjust for any particular circumstances. You can also enter your tax number to avoid a sales tax penalty. Point to be noted that Shopify doesn’t pay or file your sales taxes on your behalf.
Create an Online Store
Shopify is a platform for businesses of all sizes to create an online store. It offers users multiple active sales channels, including a website, Facebook, brick-and-mortar stores, marketplaces, etc.
Process: Go to Shopify Settings > Apps and sales channels and add Online Store as your sales channel.
Step 5: Add your products
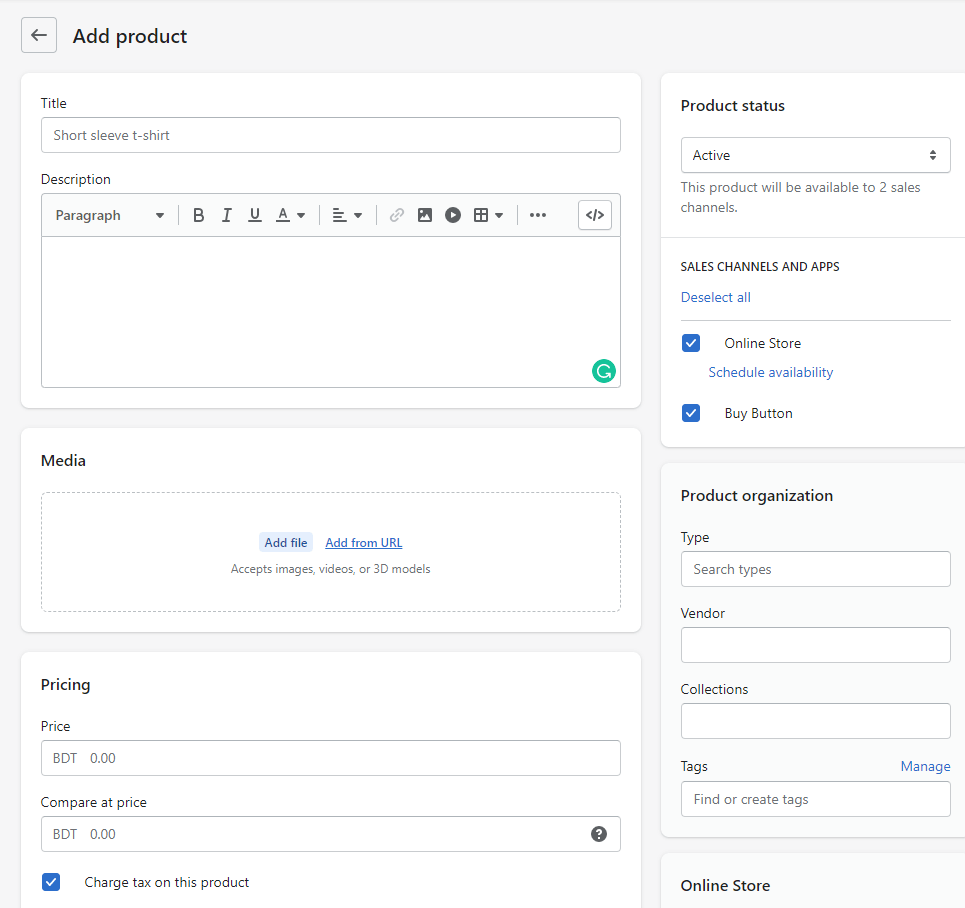
Adding your Shopify products is easy and only takes a few minutes. You must choose the category you want to import your products into. After that, you will be asked to fill in your product name, description, photos, price and inventory, and other information. If you have any questions, you can ask our customer service representatives.
You must customize these things:
- Description
- Product Images
- About Us page
- Pricing and Inventory
- Categories
Create Collections
Products organized into collections are crucial for the Shopify store. Collections help your customers find what they’re looking for, making it easy for you to keep track of your inventory.
Process: Go Home Menu to Products > Collections > Add New Collection, enter your collection Title name, Description, and Images.
Once you’ve created your collection, you can start organizing your products into it.
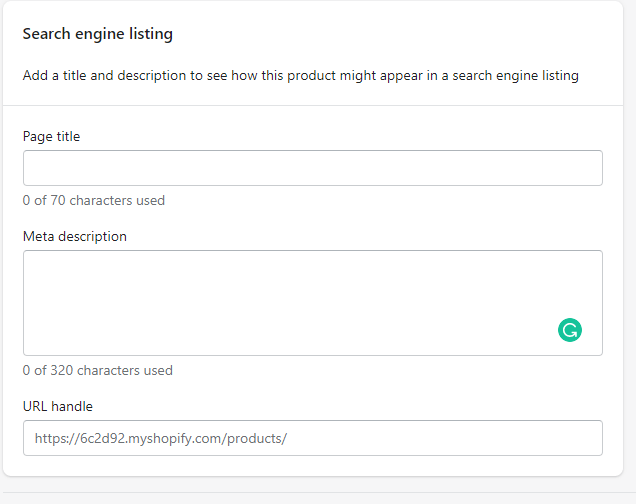
Search engine listing
To add your products to search engines, you need to fill Page title, Meta description, and product URL. Ensure that the page title must not exceed 70 characters, and the meta description must be limited to 320 characters.
Step 6: Launch your online store
When you are ready to launch your store, there are a few settings and access that you will need to test.
It is essential to test your payment processors before you launch your store. You can do this by setting up a test order and ensuring everything goes through smoothly. Once everything works correctly, you can launch your store and start taking orders!
Things to consider before launch
Add a custom domain name
Adding a custom domain name to your Shopify store is a great way to make your store look more professional and increase your brand recognition. A custom domain name is also easier for your customers to remember, leading to more repeat business.
Find 10 to 15 brand names and then ensure the name you select isn’t already taken and has an available .com domain address.
Dot com domains are typically the best for professional brands as they tend to rank higher in search engines than other domain extensions. To learn more about purchasing a domain name, you can get help from Shopify’s Domain Name Registration tool.
Create the Main Menu/ Navigation
The first thing you need to do is come up with a list of pages that you want to include in your navigation. These pages might be the home page, product pages, collections, blog, contact us, etc. Once you have this list, you can start thinking about what order you want them in and what title or label you want to give each page.
The next step is to actually create the navigation. To do this, log into your Shopify admin and go to Online Store > Navigation. Here, you will be able to create new menus and add links to those menus. For each link, you can specify the title/label as well as the URL (which page it should link to).
Once again, make sure that everything is ready to go for launch.
The final step is to check your writing for errors and ensure that the text is set up correctly. Also, edit out anything that needs correcting or fixing, and don’t forget to format properly.
Before you launch, go to your main dashboard, and select Online store> Preferences.
Here you can fill up the Homepage title, meta descriptions, social settings, Google Analytics, Facebook Pixel, and password protection. Your website can be officially live after you implement a plan for disabling your password page.
Exciting times
Step 7: Your Marketing Plan
Well done legend! Or should we say store owner. You are now in business and this is where the fun begins.
If setting up a store was all it takes then we would all be rich. The truth is once you have your complete account set up this is just the beginning. You are now in the business of selling online and your focus will need to turn to marketing and promotion.
Marketing strategy will have to be left for another article though here are a few shopify success stories to get you inspired.
Gymshark generated over A$73M in sales in 2017 through the shopify platform
Bombas is another great Shopify success story
As of 2019, CNN reports that Bombas generates over $100m per year.
We think eCommerce will continue to be a lucrative industry in 2023.
Did you know we can also help with Shopify drop-shipping.
No more manual orders. Simply add products to your store then orders are shipped to your customers with just 1 click.
Jump to our home page, register for a free account and get instant access to browsing over 1,000,000 Dropship ready products from over 100 suppliers.


